Showing posts with label how-to's. Show all posts

Tuesday, December 13, 2011

Get Your Holiday Glow on with this Easy Natural Facial Moisturizer

Do you ever look back at pictures & think, "What was going on with my skin!"

Don't let that happen to you this year! Be prepared!

Today I'm gonna give you another recipe for beautifying your skin & giving yourself a naturally healthy glow that will radiate in your holiday photos this year!

My first piece of advice would be to start out with the exfoliating scrub recipe I gave you last month. Use this 1-3 times a week or however often you need it to keep the dead skin cells off your face. This alone will give it that healthy glow.

Follow up with this recipe for a facial moisturizer that is light & absorbs well into your skin. Put it on before your makeup & especially after you wash your makeup off at night.

You'll Need:

1/2 cup distilled water
2 tsp. vegetable glycerin {draws moisture to your skin}
5 drops of essential oil {whatever smell you prefer}

Here's Whatcha' Do:

Quick & simple. Put all ingredients into a bottle & shake well before use. Apply via a cotton pad or using a spritzer attachment on your bottle to mist your skin & let it dry!

Here's to love skin in this year's pics!

Enjoy!

xo, Meagan

Thursday, December 1, 2011

Our DIY Advent Calender

Last year I wanted to make an Advent calender for the boys, but I never got around to it because I was busy. This year I made sure to put it into our schedule so that we could enjoy some extra seasonal festivities. In fact, we'll be doing a lot of festive things this year thanks to our Advent calender.


So here's a pic of our calender & below you'll find the steps I used to make it. It's simple & fun for the kids.


Start with scrapbooking paper of your choice. Cut into 4x6 inch pieces or whatever size you need to get the size pocket you want.


Fold & glue 1/4 inch all the way around. Fold in half & score with a bone folder.


Glue edges to create your pocket. Set under something heavy until glue dries.


Print off numbers 1 - 24 to put on your pockets. Cut out.


Glue your numbers to your finished pockets.


Print out tags for your daily activities, punch holes & tie with twine or ribbon. Write your activities on your tags...one for each day.


Put your tags into the appropriate pockets & hang up however you'd like! Be sure to have fun!

Below are a few of the activities we'll be doing.

Make an Advent wreath
Drive around looking for Christmas lights
Drink hot cocoa with marshmallows
Watch a Christmas movie
Paint holiday pictures on the windows
Read a Christmas story
Decorate the Christmas tree
Wrap presents
Make a homemade Christmas gift
Sing Christmas songs
Read about Baby Jesus's birth
Color Christmas pictures
Make ornaments for the Christmas Tree
....and more!

Thursday, November 17, 2011

3 Steps to a Successful Nighttime Baby Massage


There's nothing better than a baby who sleeps through the night, but as many of you know, getting your baby ready for bed begins long before bedtime comes.

I've always had babies that slept well & straight through the night early on. I would give them a nice, warm bath, followed by a good massage, some warm jammies, some snuggle time mixed with a full feeding, & off to bed they'd go. Ahhh, makes me ready for bed just thinking about it.

For me, the massage was key. Babies play all day, kicking & squirming, & by giving them a relaxing massage after a nice calming bath always helped to settle mine down quickly.

So today, I want to give you instructions on how to relax your little one with a bedtime massage.

1. Get your supplies ready

Put a blanket or towel under your baby & have your massage oil nearby. Make sure it's warm in the room. You don't want your little nudist to get too cold!

2. Start at the top & work your way down
  • Start by rubbing a little oil on your finger tips & gently rubbing it over babies forehead, nose, cheeks, & chin. Work your way down to her neck next making sure to focus on the back of it especially if she's learning to hold her head up.
  • Next move down to her shoulders & arms using a gentle but firm downward rub all the way to her fingertips. Make sure you have enough oil so that your hands slid across her skin.
  • Now go back to her chest & work your way down to her belly using small circles. Roll her over onto her tummy if she'll tolerate it & do the same thing to her back before rolling her back over. If she doesn't like being on her belly, now is not the time for tummy training. The point of the massage is to relax her.
  • Lastly you're going to start at the top of her legs & work your way down to her toes using the same downward rub you used on her arms. If you want you can stop & focus on her feet using small circles on her soles, it's totally up to her.
3. Finishing touches

Now all that's left is to get her dressed & finish up her bedtime routine.

Not only will this massage help relax your baby, but using the oil will be beneficial to her skin by providing it with nutrients & making it super soft.

So I hope you give this a try with your baby. These are the instructions that come with my Herbal Baby Oil in my shop & it would make a great baby shower gift or stocking stuffer!

Thursday, September 8, 2011

8 Steps To Making Your Own Natural Laundry Detergent


Did you know that many store bought laundry detergents have some serious chemicals in them that are no good for your or your little tot's skin &/or the environment? It's true. 

The Ickies

Here are just some of the chemicals in many name brand detergents.

  • Alkyl benzene sulfonates or ABS
  • Alkyl phenoxy polyethoxy ethanols
  • Artificial fragrances
  • Diethanolamines
  • EDTA (ethylene-diamino-tetra-acetate)
  • Optical brighteners
  • Petroleum distillates
  • Phosphates
  • Polycarboxylates
  • Polyethylene glycol (also PEG)
  • Quaternium 15
  • Xylene sulfonate

This list is from laundry-alternative.com so if you're interested in finding out more about these particular chemicals, just click the link & it will take you straight to the page that explains what each one is.

All I know is I can't even pronounce 1/4 of those words & from their descriptions, they don't sound too good for your body. They may help clean your clothes & make them look whiter & brighter, but there are plenty of other natural ways to do the same thing - minus the harm!

So today I thought I'd share with you how I make my laundry detergent for my family. I posted this recipe on naturemoms.com a while back, but today I'm gonna take you through the steps with photos so you can actually see what everything looks like!

8 Steps to Homemade Laundry Detergent


 Here's what you'll need:

  • saucepan
  • measuring cups & spoons
  • grater of some sort
  • borax
  • washing soda
  • fels-naptha soap {or other: Dr. Bronner's is great!}
  • water
  • essential oil
  • 5 gallon bucket & detergent containers

Step 1

Grate your soap & add the flakes to 4 cups of water. Heat in a saucepan until all the flakes have dissolved.

*Note: This takes a while so be patient. Don't heat to high & constantly watch it. It will boil over & you'll have a soapy mess!

 We're getting there!!

Step 2

Fill your 5 gallon bucket up 1/2 way with hot water.


Step 3

Take 1 cup of washing soda, 1/2 cup of borax, & your melted soap water & add it to your 5 gallon bucket of water.
 Mix well!
Step 4

Fill your bucket the rest of the way up with water. Let it set overnight to thicken.
Step 5 


The next day take a spoon or your hand & mix up your thickened soap. This is a bit of work & may take a little time. I use my hands because it works better for me than a spoon.
 Step 6

Take your mixed soap & pour it into your containers.
Use a funnel! If you don't you'll have more soapy mess to clean up!
 Fill your bottles half way up!
Step 7

Add in you essential oils to suit you. Remember it doesn't take much.
I use 1/2 tsp. for each bottle.

*Note: You don't have to scent your soap at all. I think it smells great with the Fels-Naptha smell only!
Step 8

Fill your containers the rest of the way up with water & voila! You're done & you have a ton of simple, pretty easy, healthy, & super cheap laundry detergent that will clean your families clothes!


I got 6 big containers of detergent which equals to about .33 cents a bottle & I don't even know how long it lasts. I'd say I make this every 6 months or so.

This recipe yields about 10 gallons of detergent. For top-load machines, use 2/3 cup per load {180 loads} & for a front-load machine, use 1/4 cup per load {640 loads}.

Some final thoughts! 

  • There are many natural laundry detergent recipes out there. You have to find one that's right for you.
  • Don't just assume that because a store bought detergent says it's for babies that it's good for you. Dreft & All Baby have icky things in them.
  • Also don't just assume that because a store bought detergent says it's natural & eco-friendly that it is. Seventh Generation also has some no-nos in it as well. Not as many, but some.

Have you ever made a homemade laundry detergent? What were your thoughts?

Thursday, September 1, 2011

Behind The Scenes: Herbal Baby Oil How-To

I thought today would be fun to share what goes on in finishing up & packaging my Herbal Baby Oil. At the same time I'll be giving you a how-to for making your own herbal infused oils so you can give it a try. It's soooo easy!

The first step in making the oil is to infuse the herbs into it. There are a few ways to do this. I'll briefly cover each before moving on.

On the Stove
Pour your oil in a saucepan & turn your heat on low. Add your herbs, stir occasionally, & let it "brew" for 2-3 hours.

In the Crock
Put your herbs into a glass jar. Fill jar half full if you're using dried herbs & fill it full if you're using fresh herbs. Pour oil over the herbs in your jar leaving 1 inch headroom at the top. Put lid on. Place jar on top of a cloth in your crockpot. Add water. Turn on low heat for 8 hours or so.

In the Sun
Same directions as "In the Crock" except you'll set your jar out in the sun for 1-2 weeks. I'd cover your jar in a thick cloth so that the light from the sun doesn't actually get to it. Sunlight will kill the properties of the herbs. All you want is the heat!

Now, what do you do once the oil is infused with the herbs? Well, I'll show you what I do.


I take a strainer & pour my herbs & oil into it so that the strainer catches the herbs & my oil comes through into a bowl. Make sure you smash the herbs into the strainer because there's good oil in them & you want to get as much of it out!


Next I take the oil from the bowl & strain it again through an old but clean t-shirt to make sure I get any little particles out. You can see from the pic above that there are a lot there!


Finally pour your oil into your containers, label, & store. Be sure to store it in a cool, dark spot. Remember too much heat & light will damage the medicinal properties of the herbs!


Here's some oil I sell in my shop. I'm weighing it to make sure there's 8 oz in the bottle!


Okay, it's all ready. Labels on, photos taken, listings in the shop! Click here to check out my oils!


Tuesday, January 11, 2011

DIY Felt Plush Heart

Plush Felt Pin Cushion by Baby Swank

     If you've checked out the plush animals section of my shop, you've seen my chickie, "Scrappy". Cute, isn't he?

     Making plush items is so easy and a lot of fun. So today I'm gonna show you how to make a Plush Heart out of felt. I figured a heart was appropriate since Valentine's Day is just around the corner. You can use this for so many things because it's so cute and fun...and easy! I'm using mine for a pin cushion since my current one is almost kaput, but it would also make a cute decoration for a party or room.

~*~*~*~*~*~*~*~*~*~*~*~*~*~*~*~*~*~*~*~*~*~*~*~*~*~*~*~*~*~*~*~*~*~*~*~*~*~*~


Supplies:
3 colors of felt
stuffing - I used FiberFil
embroidery thread
needle, chalk, scissors


Cut Away!
Okay, so here you're going to want to cut out 3 sizes of hearts. Pick the color you want for your main heart and cut out 2 hearts the exact same size. Then cut another heart a tad smaller from your next color, and the third heart even smaller than the second in the last color.


Layer and Stitch:
     Now you want to layer your hearts. Does it look okay or do you need to trim some more? I decided that for my heart, I would put a little stuffing in between each layer so that my finished product had a bit more depth. You can make your heart flat if you want.
     Take your top heart (smallest) and start stitching it to the middle heart using your embroidery thread and needle. Use any kind of stitch you'd like. I used a basic stitch to keep it simple. BUT WAIT...don't stitch it closed if you're going to stuff in between each layer. Stop when you have 3/4 of it stitched, put a bit of stuffing in, then finish it up. Repeat this same process for the last layer.


Now for the finishing touch!
     Follow the above stitching instructions to stitch your big hearts together. I changed my stitch here to a button hole stitch to make it more decorative. Make sure you leave room to stuff it full before finishing up. Viola! All done! Now you can add a cute ribbon, lace, or rik-rak to the back so you can hang it, or if you're gonna use it as a pin cushion like I am, you can attach some hook and loop to the back and secure it somewhere!


~*~*~*~*~*~*~*~*~*~*~*~*~*~*~*~*~*~*~*~*~*~*~*~*~*~*~*~*~*~*~*~*~*~*~*~*~*~*~


handmade projects


Wednesday, December 15, 2010

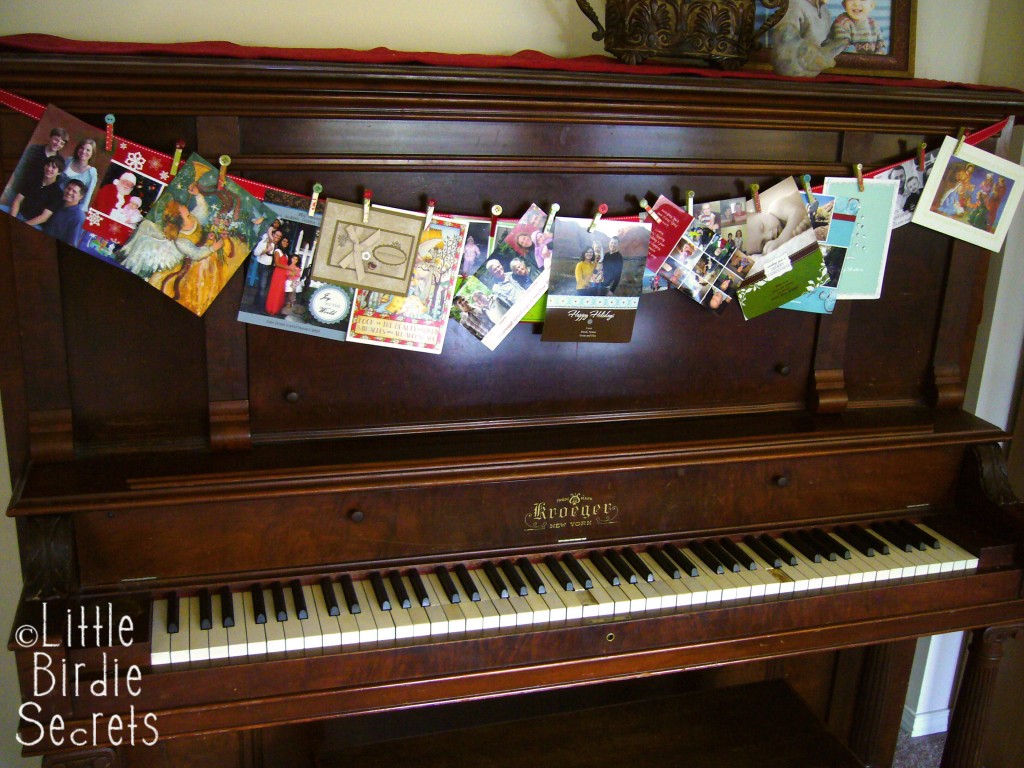
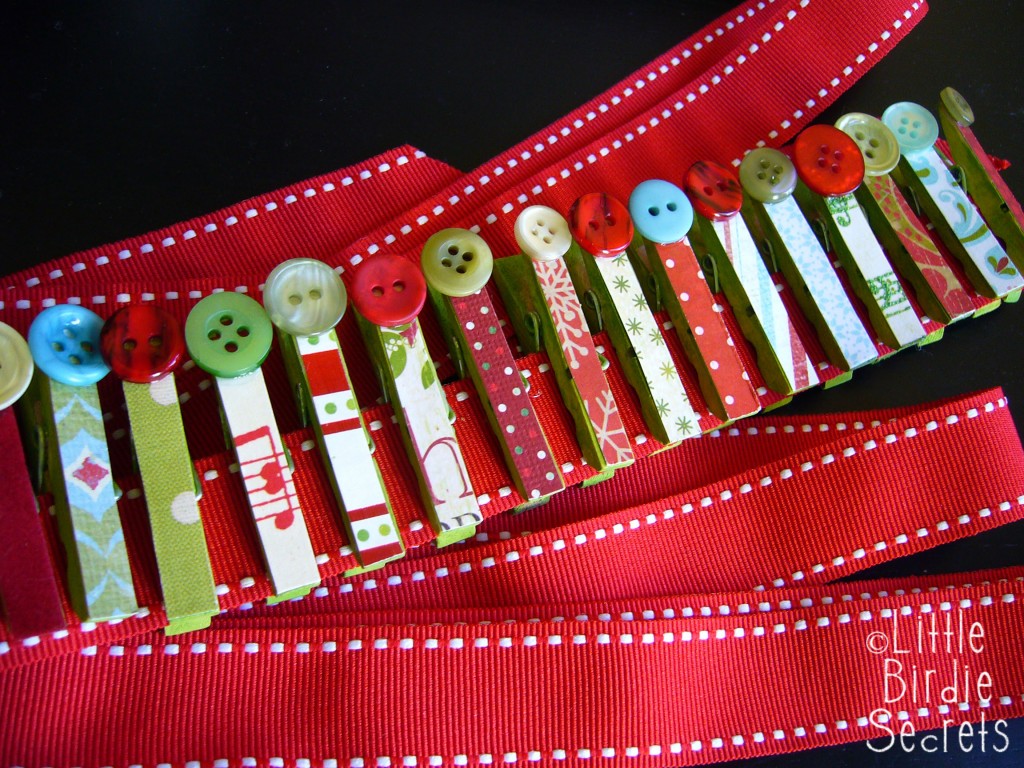
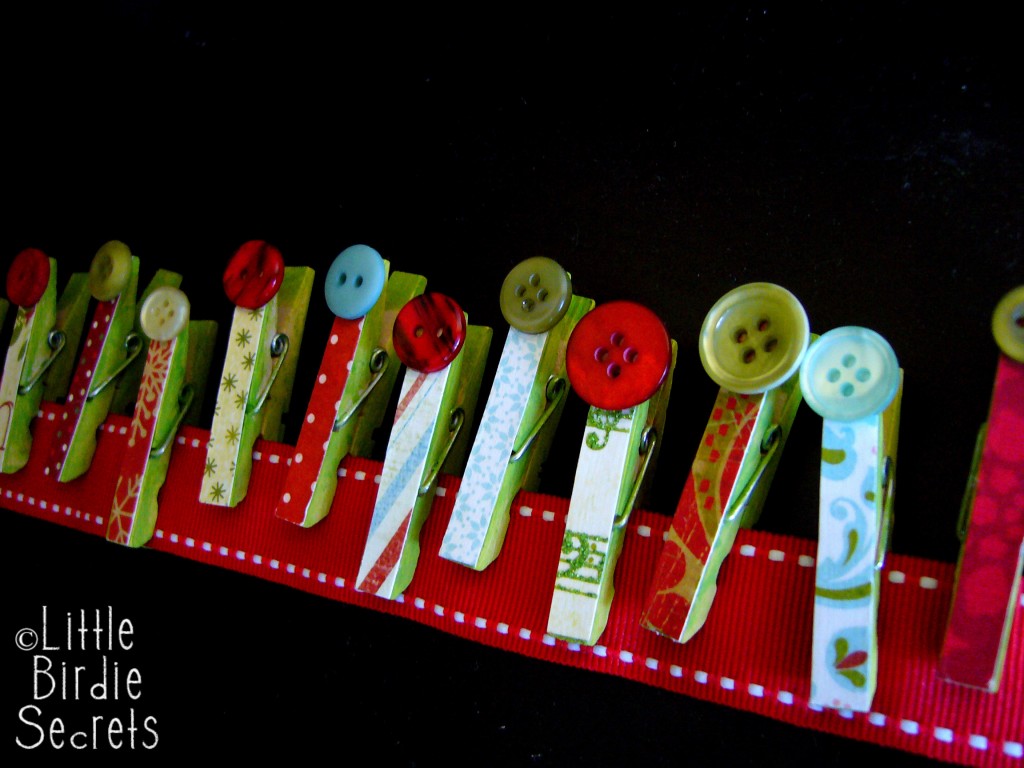
Christmas Card Garland tutorial

OMGoodness! This is so cute! I'm always wishing there was something fun and decorative I could do to hang my Christmas cards every year. Normally I just stick them up around my door-frames, but then I run into the problem of them falling out or not fitting in some places.


Anyway, I was looking at another blog I follow today, and they linked to this tutorial which is so cute and creative. Plus it seems super easy. Anyone could do this and it's way cheap! So here's the link...Christmas Card Garland Tutorial! Go check it out, and if you do decide to make one of these, post your pics here so I can see how creative you are. I may get around to doing it too!


Sunday, December 5, 2010

Etsy Mom Holly Day Blog Hop - Huge Giveaway

Check out all of the fabulous holiday-themed projects, gift ideas, and more from our wonderful EtsyMom Blog Hop Contributors from around the world!!
Here's how it works:
1. Hop through each of the blogs listed above to get fabulous holiday inspiration and leave a comment. If you are starting at a blog in the middle of the Hop, start back at the EtsyMom Blog. You may have to scroll down a bit on the blogs to find the Blog Hop posts as the week progresses.
2. Leave a comment on the EtsyMom Blog post between now and December 11, 2010.
3. Enter to win our giveaway by doing any of the following. For each thing you do, you will be entered into the drawing one more time:

~Leave a comment on the EtsyMom Blog post between now and December 11, 2010.
~Leave a comment on the Holly Day Blog Hop posts for any of the blogs listed above between Dec 5 and Dec 11, 2010.
~Join the EtsyMom Blog email list (fill out the form in the right hand column).
~Become a follower of the EtsyMom Blog! Just click the "Follow" button in the lower right column.
~"Like" the EtsyMom Facebook Page.

Share about this Blog Hop on your own blog, posting a link to this page.
Share about this Blog Hop on Facebook, posting a link to this page.
Share about this Blog Hop on a message board or forum, posting a link to this page.
To let us know you've done these things, please come back to the EtsyMom Blog post and leave a comment for each thing you did.
Sorry - you cannot enter the giveaway here on my blog.

On December 11, 2010 we'll choose a winner using the Random Integer Generator from random.org. The winner will receive this super sweet gift basket full of handmade holiday goodies, including:
a pair of Turquoise Earrings from
http://www.stoneymistdesign.etsy.com/
a lampwork bead bracelet by
http://handmadewhimzy.etsy.com/
sterling silver and Swarovski pearl/crystal holiday earrings by
a cream colored cotton scarf given by
http://www.zoegirldesigns.etsy.com/
a raincloud ornament from
http://www.etsy.com/shop/babyjives
a matching splat mat and baby bib from
http://www.babysindulgence.etsy.com/
two pair of earrings from
http://quirefly.etsy.com/
a gift pack of over 30 pages of vintage paper ephemera by
http://www.etsy.com/shop/countrychiccottage
a lovely sustainable stocking from
http://www.rikrak.etsy.com/
a set of holly jolly gift tags from
http://cinnamonspice.etsy.com/
a set of toddler pajamas in a style of the winner's choice from
http://heatheregley.etsy.com/
a $15 gift certificate from
http://camelotstreasures.etsy.com/
A gift certificate from
http://babyswank.etsy.com/
A Custom copper heart necklace from
http://www.etsy.com/shop/ct2designs

Candy Cane Candle

So today I'm gonna be showing you a cute little holiday craft that's super simple to make and will add a festive touch wherever you put it! It's a Candy Cane Candle!

All you need are some candy canes...any color or flavor, a candle that matches your candy canes, and a hot glue gun.

Next...take all the plastic off your candy canes, and start gluing the candy canes to your candle with the hook part facing out!

 Voila! Like I said, super simple and totally festive! Plus, when you burn your candle it will smell a tad like peppermint...if you got an unscented candle and peppermint candy canes, of course.


Okay, be sure to visit the next blog in the hop...Baby's Indulgence
And if you want to start from the beginning, click here!

Wednesday, December 1, 2010

Do-it-Yourself Advent Calender

     So I was running around on Twitter today, tweeting away, when I came across this really neat idea on another blog about a DIY Advent Calender. How cool that I've been thinking about wanting to get one of these lately, and then I just run across an awesome blog post on how to make one. My oldest son is 2 1/2 and I think he would really enjoy doing it, and what a great, fun tradition to start!

     Now there are tons of Advent calenders out there that you can buy or have made for you...eemmm Etsy anyone, but there are also plenty of how-to's on making one yourself. So if you're anything like me, and you see something and say to yourself, "I can so make that!", then this how-to is for you. It's so easy and very cute!


     This one was designed by Rebecca from The Ardent Sparrow who's a wife, mother, blogger, and jewelry designer among other things. The thing I really like about this Advent calender, is that it's not your typical calender. Plus you can get everything you need at Michael's craft store, which for me is a big deal because I'm from a SMALL town and there's a Michael's about an hour down the road...and for those of us here in smallville isn't far! Last but not least, it's a festive decoration that will look great in your house! So take a look at her post, and leave her a comment telling her what you think.

     Now, as far as gifts for each day go, what type of things would you put in it? Candy, stocking stuffers, what? I want to hear your ideas and suggestions, so leave a comment below and give me some good ideas!